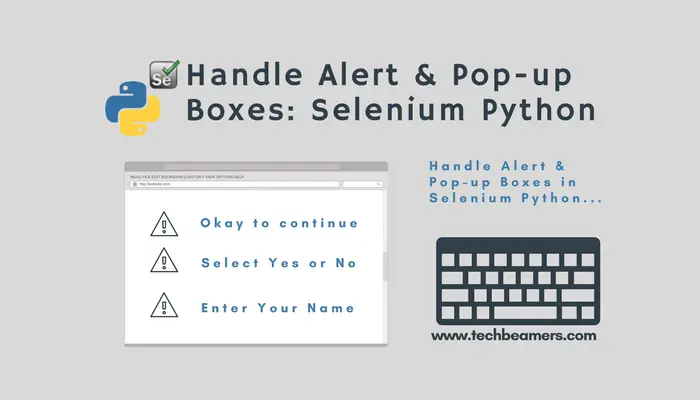
In the Selenium Python tutorial series, we’ll learn to handle alerts and pop-up boxes on a web page.
Why handle alerts or popups in Selenium?
It is usually a standard practice for web applications to display alert messages to confirm a user’s action. An Alert is a pop-up window. It is shown due to some action done by the user or automatically due to some system settings.
Purpose and types of alerts
The purpose of alerts is to give some information to the user (it can be a warning also), get permission from the user, or take some input from the user. Click here to Go Back to the main Selenium Python tutorial.
We can broadly divide the alerts into the following three types.
i) Simple Alert
ii) A Confirmation Alert
iii) Prompt Alert
We will now discuss how to handle the above three types of alerts in detail.
How to handle alerts & popups
Whenever an alert is raised, a pop-up appears on the web page. The control remains with the parent web page only. So the first task for the Selenium Webdriver is to switch the focus from the parent page to the Alert pop-up. It can be done using the following code snippet.
alert_obj = driver.switch_to.alert
After the control has moved to the alert pop-up, we can do different actions over it. The following are some methods used to handle the popups.
alert_obj.accept()– used to accept the Alertalert_obj.dismiss()– used to cancel the Alertalert.send_keys()– used to enter a value in the Alert text box.alert.text()– used to retrieve the message included in the Alert pop-up.
Next, we have compiled three different ways to suppress the alerts.
Handle a simple alert
A Simple Alert has a message on it and an ‘OK’ button. When it pops up, a user clicks on the ‘OK’ button to accept it.
Here is the HTML code that will generate a Simple Alert at the click of the ‘Create Alert’ button on the main page.
<!DOCTYPE html>
<html>
<body bgcolor="#C0C0C0">
<h1>
Simple Alert Demonstration</h1>
<p>
click the Below Button to create an Alert</p>
<button onclick="alertFunction()" name ="alert"> Create Alert</button>
<script>
function alertFunction() {
 alert("Hi!, I am a Simple Alert. Please Click on the 'OK' Button.");
}
</script>
</body>
</html>
You need to copy the above HTML code and save it as “Simple_Alert.HTML.”
Following is the code snippet to handle Simple Alert.
from selenium import webdriver
import time

driver = webdriver.Firefox()
driver.maximize_window()
location = "file://<Specify Path to Simple_Alert.HTML>"
driver.get(location)

#Click on the "Alert" button to generate the Simple Alert
button = driver.find_element_by_name('alert')
button.click()

#Switch the control to the Alert window
obj = driver.switch_to.alert

#Retrieve the message on the Alert window
msg=obj.text
print ("Alert shows following message: "+ msg )

time.sleep(2)

#use the accept() method to accept the alert
obj.accept()

print(" Clicked on the OK Button in the Alert Window")

driver.close
The above code simulates a Simple Alert and then switches the control to the Alert window. After that, it verifies the message in the Alert window and accepts it.
Handle a confirmation popup
It is similar to Simple Alert. Just that it has an extra ‘Cancel’ button to dismiss the Alert if required.
The following HTML code will generate a Confirmation Alert.
<!DOCTYPE html>
<html>
<body bgcolor="#C0C0C0">
<h1>
Confirmation Alert Demonstration</h1>
<p>
click the Below Button to create an Alert</p>
<button onclick="alertFunction()" name ="alert"> Create Alert</button>
<p id ="msg">
</p>
<script>
function alertFunction() {
 var txt;
 if (confirm("Hi!! I am Confirmation Alert.")) {

 txt = "You pressed OK!"

} else {

txt = "You pressed CANCEL!"
 }
 document.getElementById("msg").innerHTML = txt;
}
</script>
</body>
</html>
I have saved this file on my local desktop with the name ‘Confirmation_Alert.HTML.’
Here is the code to handle the Confirmation Alert.
from selenium import webdriver
import time

driver = webdriver.Firefox()
driver.maximize_window()
location = "file://<Specify Path to Confirmation_Alert.HTML>"
driver.get(location)

#Click on the "Alert" button to generate the Confirmation Alert
button = driver.find_element_by_name('alert')
button.click()

#Switch the control to the Alert window
obj = driver.switch_to.alert

#Retrieve the message on the Alert window
message=obj.text
print ("Alert shows following message: "+ message )

time.sleep(2)

#Section 1
#use the accept() method to accept the alert
obj.accept()

#get the text returned when OK Button is clicked.
txt = driver.find_element_by_id('msg')
print(txt.text)

time.sleep(2)

#refresh the webpage
driver.refresh()

# Section 2
# Re-generate the Confirmation Alert
button = driver.find_element_by_name('alert')
button.click()

time.sleep(2)

#Switch the control to the Alert window
obj = driver.switch_to.alert

# Dismiss the Alert using
obj.dismiss()

#get the text returned when Cancel Button is clicked.
txt = driver.find_element_by_id('msg')
print(txt.text)

driver.close
Let’s now summarize the steps mentioned in the above code.
- First of all, save the above HTML code under the name ‘Confirmation_Alert.HTML’ in the machine.
- We have to specify the above path in the placeholder defined in the Webdriver code to handle the Confirmation alert.
- Now in Section 1 of the code, we click on the ‘OK’ button to accept the alert. After that, we printed the return message displayed on the screen.
- In Section 2 of the code, we open the Confirmation alert one more time. This time we click on the ‘Cancel’ button to dismiss the alert box. After that, we printed the return message displayed on the screen.
Respond to a prompt alert
It is also similar to the first two alerts. The only difference is that Prompt allows us to enter some text through it.
Following is the HTML code that will generate a Prompt alert.
<!DOCTYPE html>
<html>
<body bgcolor="#E6E6FA">
<h1>
Employee Login</h1>
<button onclick="myFunction()"name ="employeeLogin">Continue</button>

<p id="msg">
</p>
<script>
function myFunction() {
 var login = prompt("Please re-enter your name", "xxxxxx");

 if (login != null) {
 document.getElementById("msg").innerHTML =
 "Welcome " + login + "!! How can I help you?";
 alert("You have logged in successfully !!")
 }
}
</script>
</body>
</html>
You need to save this file as ‘Prompt_Alert.HTML.’ It is simple to handle this alert too. After shifting the focus to alert, we can enter the text into it using the send_keys() method.
Here is the complete code for the same.
from selenium import webdriver
import time

driver = webdriver.Firefox()
driver.maximize_window()
location = "file://<Specify Path to Prompt_Alert.HTML>"
driver.get(location)

#Click on the "employeeLogin" button to generate the Prompt Alert
button = driver.find_element_by_name('continue')
button.click()

#Switch the control to the Alert window
obj = driver.switch_to.alert

time.sleep(2)

#Enter text into the Alert using send_keys()
obj.send_keys('Meenakshi')

time.sleep(2)

#use the accept() method to accept the alert
obj.accept()

#Retrieve the message on the Alert window
message=obj.text
print ("Alert shows following message: "+ message )

time.sleep(2)

obj.accept()

#get the text returned when OK Button is clicked.
txt = driver.find_element_by_id('msg')
print(txt.text)

driver.close
Let’s look at the code in detail.
- First of all, save the HTML code to create the Prompt Alert with the name ‘Prompt_Alert.HTML’ on your machine.
- You have to give the path of this file in the placeholder provided in the code. You must use a forward slash while specifying the URL of the web page. Otherwise, it may not work accurately.
For example, here I have to give the path of the file as.
location = "file://C:\Users/Automation-Dev/Desktop/Meenakshi/Selenium Python/Prompt_Alert.HTML
- After you move the control to the alert using <driver.switch_to.alert>, use the “send_keys()” method to enter the text in the alert window.
Before You Leave
It is vital to understand how to handle alerts and popup boxes using Selenium Python. You can apply the above techniques to solve real-time use cases in your projects.
Lastly, our site needs your support to remain free. Share this post on social media (Linkedin/Facebook) if you gained some knowledge from this tutorial.
Enjoy coding,
TechBeamers.


