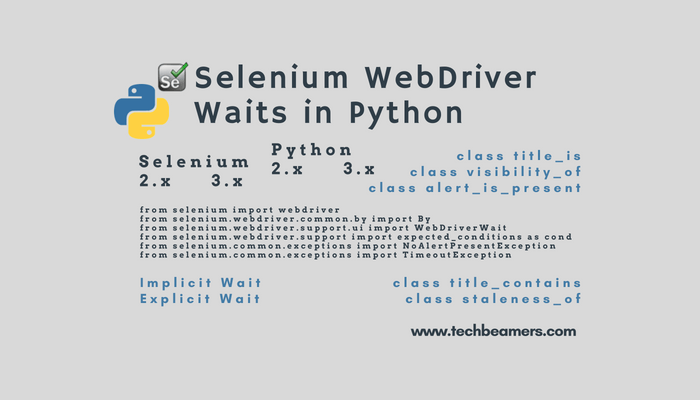
This tutorial will guide you through the concept of Selenium Webdriver waits (Implicit and Explicit Waits) and how to use them in Python.
Why need waits in Selenium Python scripts?
If you are doing automation in Selenium Python and wish to write error-free scripts, then you must learn to use waits. They let you handle any unexpected condition that may occur.
While automating a web application, you intend to write a script to execute the following tasks. If you want to achieve these successfully, waits will come in handy.
1. Load up the browser,
2. Open up the website,
3. Locate the elements, and
4. Execute the needed action.
Click here to Go Back to the main Selenium Python tutorial.
What happens if not using waits?
When you are not using waits, your test script might fail for the following reasons:
1. The web element was not present as it could not load due to runtime issues.
2. The use of AJAX techniques in web applications has introduced uncertainty. It may cause some delay in the loading of the web page or its web elements, hence failing to locate them.
3. Many times, due to peak traffic or network latency, our application may behave differently than it does at normal, optimal conditions.
In these cases, we need to wait for the time to allow the web elements to load completely, before using them in our tests. Webdriver API provides two types of wait mechanisms to handle such conditions. We will discuss these wait conditions one by one in detail.
Selenium Webdriver Waits in Python
The two types of Selenium Webdriver waits are :
- Implicit Wait
- Explicit Wait
Implicit Wait
An implicit wait directs the WebDriver to poll the DOM for a certain amount of time (as mentioned in the command) when trying to locate an element that is not visible immediately. The default value of time that can be set using Implicit wait is zero. Its unit is in seconds. Implicit wait remains associated with the web element until it gets destroyed.
Follow the below coding snippet illustrating the use of Implicit wait in Python.
from selenium import webdriver
from selenium.webdriver.common.keys import Keys

driver = webdriver.Firefox()
driver.implicitly_wait(100)

driver.get("http://google.com")
driver.maximize_window()

print("Implicit Wait Example")

inputElement = driver.find_element_by_id("lst-ib")
inputElement.send_keys("Techbeamers")
inputElement.submit()

driver.close()
In the above code, the implicitly_wait( ) method tells the Webdriver to poll the DOM again and again for a certain amount of time. The timeout in this example is 100 seconds which will trigger if the target element is not available during that period.
We define Implicit wait for a Webdriver object so it will remain active until the existence of that object.
Explicit Wait
There may be scenarios when the wait time is uncertain. Explicit waits work as a savior there. Here we can define certain conditions, and Selenium WebDriver will proceed with the execution of the next step only after this condition gets fulfilled.
The explicit wait is the most preferred way of implementing Selenium webdriver waits in a test script. It provides the flexibility to wait for a custom condition to happen and then move to the next step.
Following are the two Selenium Python classes needed to implement explicit waits.
- WebDriverWait, and
- Expected Conditions class of the Python.
To understand its usage, let’s take an example of a Simple JavaScript alert on a webpage. A button is present on the web page to trigger that alert.
How to use webdriver waits in Python?
One of the use cases would be to click on the button and verify whether it fires the alert or not. Using the Explicit wait with Expected conditions WebDriver will wait for the time only till the Simple JavaScript is not visible on the screen. As soon as it appears, the WebDriver will move on to execute the next step.
However, if the alert does not appear until the maximum wait time defined in the explicit wait, Webdriver will throw a “NoAlertPresentException.”
HTML code
Here is the HTML code for generating a simple alert using JavaScript.
<body bgcolor="#C0C0C0">
<h1>Simple Alert Demonstration</h1>
<p>
Press button underneath to generate an alert.
</p>
<button onclick="alertFunction()" name ="alert">Generate Alert</button>
<script>
function alertFunction() {
    alert("Hello! I'm a Simple Alert.\nPlease press the 'OK' button.");
}
</script>
</body>
</html>
You need to save this file on your computer and name it the ‘Simple_Alert.HTML.’
Code snippet
Following is the code snippet demonstrating the Explicit wait.
from selenium import webdriver
from selenium.webdriver.common.by import By
from selenium.webdriver.support.ui import WebDriverWait
from selenium.webdriver.support import expected_conditions as cond
from selenium.common.exceptions import NoAlertPresentException
from selenium.common.exceptions import TimeoutException

driver = webdriver.Firefox()
driver.maximize_window()
#location = "file://<Specify Path to Simple_Alert.HTML>"
location = "file://C:/Users/Automation-Dev/Desktop/Meenakshi/Selenium%20Python/Simple_Alert.HTML"
driver.get(location)

#Press the "Alert" button to demonstrate the Simple Alert
button = driver.find_element_by_name('alert')
button.click()

try:
    # Wait as long as required, or maximum of 10 sec for alert to appear
    WebDriverWait(driver,10).until(cond.alert_is_present())

    #Change over the control to the Alert window
    obj = driver.switch_to.alert

    #Retrieve the message on the Alert window
    msg=obj.text
    print ("Alert shows following message: "+ msg )

    #Use the accept() method to accept the alert
    obj.accept()

except (NoAlertPresentException, TimeoutException) as py_ex:
    print("Alert not present")
    print (py_ex)
    print (py_ex.args)
finally:
    driver.quit()
In the above script, the timeout value is 10 seconds. It means the Webdriver will wait for 10 seconds before throwing a TimeoutException.
If the element is found, it may return within 0 – 10 seconds. By default, the WebDriverWait API executes the ExpectedCondition every 500 milliseconds until it returns successfully.
If the ExpectedCondition matches, the return value will be a Boolean (TRUE) whereas a non-null value for all other ExpectedCondition types.
Standard Expected Conditions
There are several standard conditions that you may commonly encounter while automating web pages. Below is the list displaying the names of each of them. All of these classes are available on the selenium.webdriver.support.expected_conditions Python module.
- class alert_is_present
To wait for an alert to appear. - class element_located_selection_state_to_be(ui_locator, is_selected)
To wait for an element to locate having a specified state. - class element_located_to_be_selected(ui_locator)
To wait for an element to be located in the selected state. - class element_selection_state_to_be(ui_element, is_selected)
To wait to find an element having a specified state. - class element_to_be_clickable(ui_locator)
To wait for an element to locate which is in a clickable state. - class element_to_be_selected(ui_element)
To wait for an element to find which is in a selected state. - class frame_to_be_available_and_switch_to_it(ui_locator)
To wait for a frame to become available for the switchover. - class invisibility_of_element_located(ui_locator)
To wait for an element that is invisible or not in the DOM. - class staleness_of(ui_element)
To wait for an element to be removed from the DOM. - class text_to_be_present_in_element(ui_locator, inner_text)
To wait for an element to be found in a given text. - class text_to_be_present_in_element_value(ui_locator, value)
To wait for an element to be found with a given text inside the locator. - class title_contains(title_text)
To wait to find a title containing the specified text in a case-sensitive format. - class title_is(title)
To wait to find a title matching the exact specified text. - class visibility_of(ui_element)
To wait to find a functionally visible element. - class visibility_of_all_elements_located(ui_locator)
To wait to find all functionally visible elements the specified locator will return. - class visibility_of_any_elements_located(ui_locator)
To wait to find at least one functionally visible element the specified locator will return. - class visibility_of_element_located(ui_locator)
To wait to find a specific and functionally visible element the specified locator will return.
Quick Wrapup – Selenium Webdriver Waits in Python
In Selenium Python binding, you can easily find methods to handle these. It saves you from writing any user-defined expected condition class or creating a package for the same.
Understanding Selenium Webdriver waits is key to producing high-quality automation test scripts. We hope this tutorial has directed you to the right approach.
For more updates on Selenium Python tutorials, follow our social media accounts to notify you of more free and useful tutorials.
Lastly, our site needs your support to remain free. Share this post on social media (Linkedin/Twitter) if you gained some knowledge from this tutorial.
Enjoy coding,
TechBeamers.


